I will try my best to share this How-To that may be many people already know how to install it.
In this tutorial, I assume we already have Fresh Ubuntu 9.10 Server Edition with OpenSSH installed (for remote).
Before we start everything, what we must do is to update the repository and upgrade the current installed package.
$ sudo apt-get update && sudo apt-get upgrade
After the repository updated and we have upgrade our package, we need to install new package that required to run Adempiere.
$ sudo apt-get install sun-java6-jdk postgresql-8.3 postgresql-server-dev-8.3 postgresql-8.3-pljava
Well, after the database & java installed. We need to setting it’s environment and configuration files.
$ sudo vi /etc/environments
add :
JAVA_HOME=”/usr/lib/jvm/java-6-sun”
Check the java platform (u should see i386 for intel processor or other might be AMD)
$ sudo find /usr/lib/jvm/java-6-sun/jre/lib -type d
Add the java platform to the configuration files.
$ sudo vi /etc/ld.so.conf.d/jvm.conf
add :
/usr/lib/jvm/java-6-sun/jre/lib/i386
/usr/lib/jvm/java-6-sun/jre/lib/i386/client
/usr/lib/jvm/java-6-sun/jre/lib/i386/server
/usr/lib/jvm/java-6-sun/jre/lib/i386/native_threads
Next, we configure the database to allow access.
$ sudo vi /etc/postgresql/8.3/main/postgresql.conf
change to :
listen_addresses = ‘*’ # what IP address(es) to listen on;
Configure and add permission to access the postgreSQL
$ sudo vi /etc/postgresql/8.3/main/pg_hba.conf
add :
local all postgres md5
local all adempiere md5
host all postgres 192.168.111.0/24 md5
host all adempiere 192.168.111.0/24 md5
Restart the database server.
$ sudo /etc/init.d/postgresql-8.3 restart
After we set the environment and configure the database, we will create database user and database for Adempiere installation.
$ sudo su -
# su – postgres
postgres:~$ createuser -P -E -d adempiere
postgres:~$ createdb -E UTF8 -O adempiere adempiere
postgres:~$ /etc/init.d/postgresql-8.3 restart
postgres:~$ exit
Now, we create adempiere user and adempiere home.
# adduser adempiere
# su – adempiere
adempiere:~$ vi .bashrc
add :
ADEMPIERE_HOME=/home/adempiere/Adempiere
refresh the profile
adempiere:~$ source .bashrc
Well … until this step, we already 80% to accomplish this installation. Now we need Adempiere installation files for the next step.
adempiere:~$ wget http://downloads.sourceforge.net/adempiere/Adempiere_342s.zip
adempiere:~$ unzip Adempiere_342s.zip
adempiere:~$ exit
Importing the Dump Database
# su – postgres
postgres:~$ psql -d adempiere < /home/adempiere/Adempiere/data/Adempiere_pg.dmp postgres:~$ exit
For installation on XWindows, we just run “RUN_Setup.sh” then fill the required setting on the pop-up windows. But now we are installing without GUI / XWindows, what we must do is edit the Environment files and fill according to our setting.
# su – adempiere
adempiere:~$ cd Adempiere
adempiere:~$ cp AdempiereEnvTemplate.properties AdempiereEnv.properties
adempiere:~$ vi AdempiereEnv.properties
here are my Env files :
ADEMPIERE_HOME=/home/adempiere/Adempiere
JAVA_HOME=/usr/lib/jvm/java-6-sun
ADEMPIERE_DB_TYPE=postgresql
ADEMPIERE_DB_SERVER=erp.yourdomain.com
ADEMPIERE_DB_PORT=5432
ADEMPIERE_DB_NAME=adempiere
ADEMPIERE_DB_SYSTEM=postgres
ADEMPIERE_DB_USER=adempiere
#Database user password
ADEMPIERE_DB_PASSWORD=xxxx <<<< YOUR PASSWORD
ADEMPIERE_APPS_TYPE=jboss
ADEMPIERE_APPS_SERVER=erp.yourdomain.com
ADEMPIERE_JNP_PORT=1099
ADEMPIERE_WEB_PORT=8088
ADEMPIERE_SSL_PORT=4443
ADEMPIERE_KEYSTORE=/home/adempiere/Adempiere/keystore/myKeystore
ADEMPIERE_KEYSTOREWEBALIAS=adempiere
ADEMPIERE_KEYSTORECODEALIAS=adempiere
ADEMPIERE_KEYSTOREPASS=xxx <<< YOUR PASSWORD
ADEMPIERE_CERT_CN=erp.yourdomain.com
ADEMPIERE_CERT_ORG=Your Company Name
ADEMPIERE_CERT_ORG_UNIT=YourOrganisationUnit
ADEMPIERE_CERT_LOCATION=Jakarta
ADEMPIERE_CERT_STATE=DKI-JAYA
ADEMPIERE_CERT_COUNTRY=ID
after we edit that files, now we must make it executable.
adempiere:~$ chmod +x *.sh
adempiere:~$ cd utils
adempiere:~$ chmod +x *.sh
adempiere:~$ cd ..
adempiere:~$ RUN_silencesetup.sh
Wait Till the Installation Finish …………. FINISH !!!
then we can try it by start the server
adempiere:~$ /home/adempiere/Adempiere/utils/RUN_Server2.sh
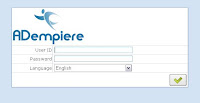
Now, Congratulation you have finish the Adempiere Installation. Open your favourite Internet Browser (must support java) then btowse to http://erp.yourdomain.com:8088/webui